This month, almost suddenly, an intense DIY fever hit me at full force. I just got up one day and thought: I’m gonna make a bunch of awesome stuff. And so I did!
I sat down and pulled my trusty materials out of my arts ’n’ crafts drawer. It is a wonderful thing to be blessed with boundless creative energy and take the exciting step of channelling it into something beautiful.
The DIY Inspiration Overload
Now, freshly familiarized with the abundant contents of my craft drawer, I took to Pinterest on the important quest of gathering inspiration. This, however, proved more difficult than I had initially anticipated. Pages upon pages of gorgeous, awesome ideas for bows, bits ’n’ trinkets flooded my senses and made it exceedingly hard to decide what to make.
Overwhelmed yet still excited, I took to creating.
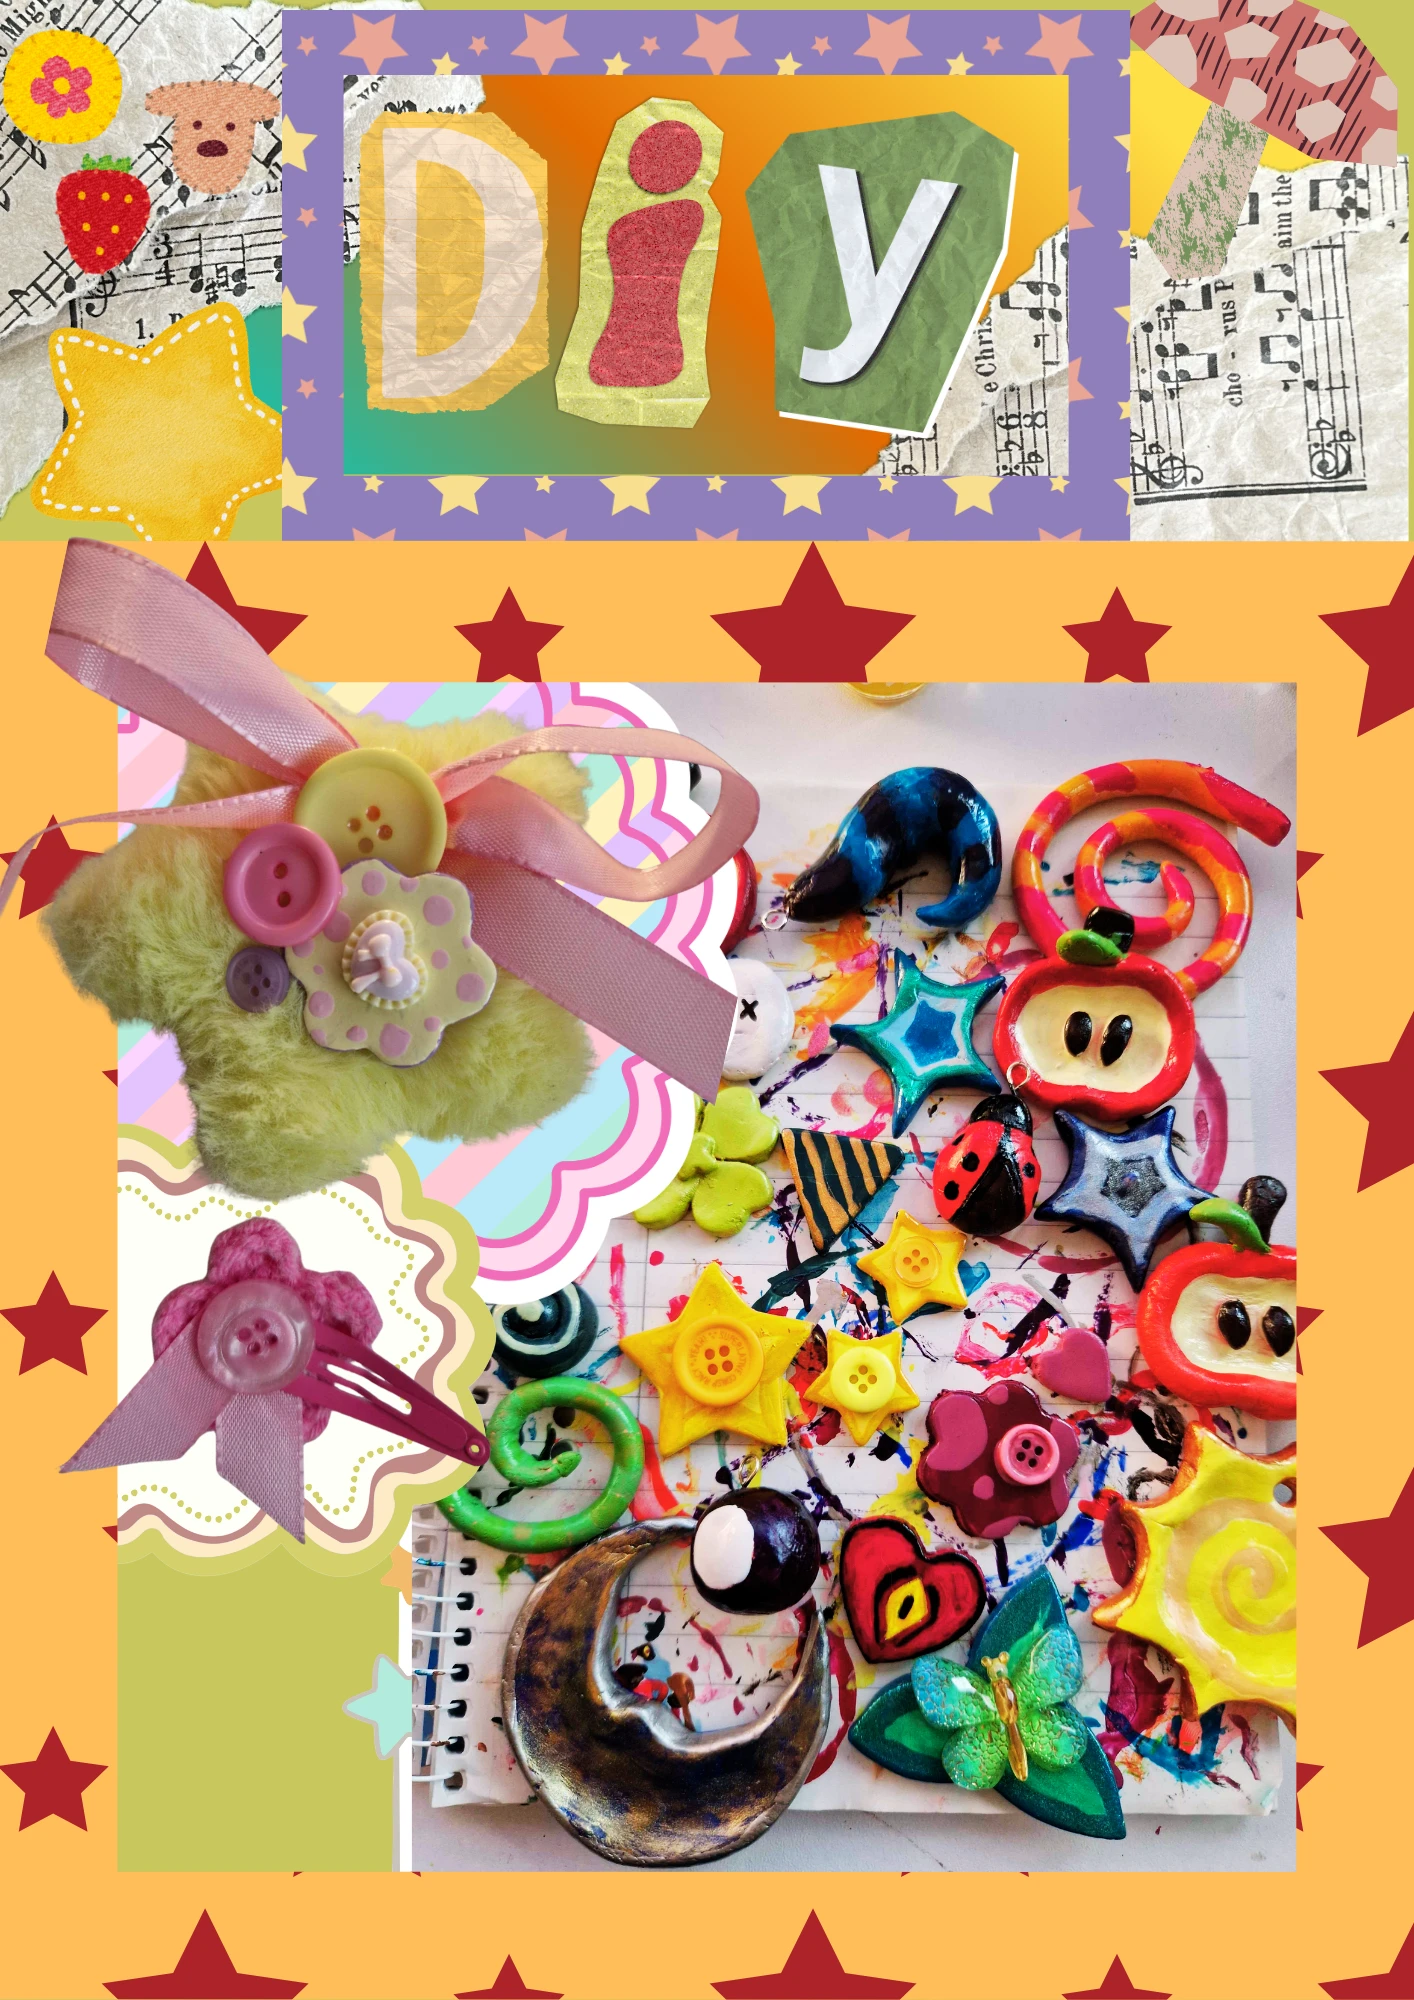
First on my list were numerous charms, formed out of air-dry clay. I felt like if I started out by making charms, I could then, in turn, use them in any number of different crafts. In three intense afternoons, I had created almost every saved clay inspiration from my considerable DIY board, plus about as many charms as I came up with in that brain of mine.
Faced with a plethora of clay hearts, fruit, stars, moons and the likes, I could finally start turning them into something wearable. Since my rooms are already bursting with decorative DIY projects, self-painted art and so on, I wanted to turn most of my DIY things into accessories.
For this purpose, I’d bought a bunch of knick-knacks in my local craft store, which doubles as some kind of everything-at-once shop. Smaller charms I grouped or combined into keychains or hung them up on a belt. The little plates I made mostly with cookie cutters were turned into brooches, hair clips or molded onto hairbands. Even making a choker was easily done, mostly with the help of ribbon.
Making Something Out of Nothing
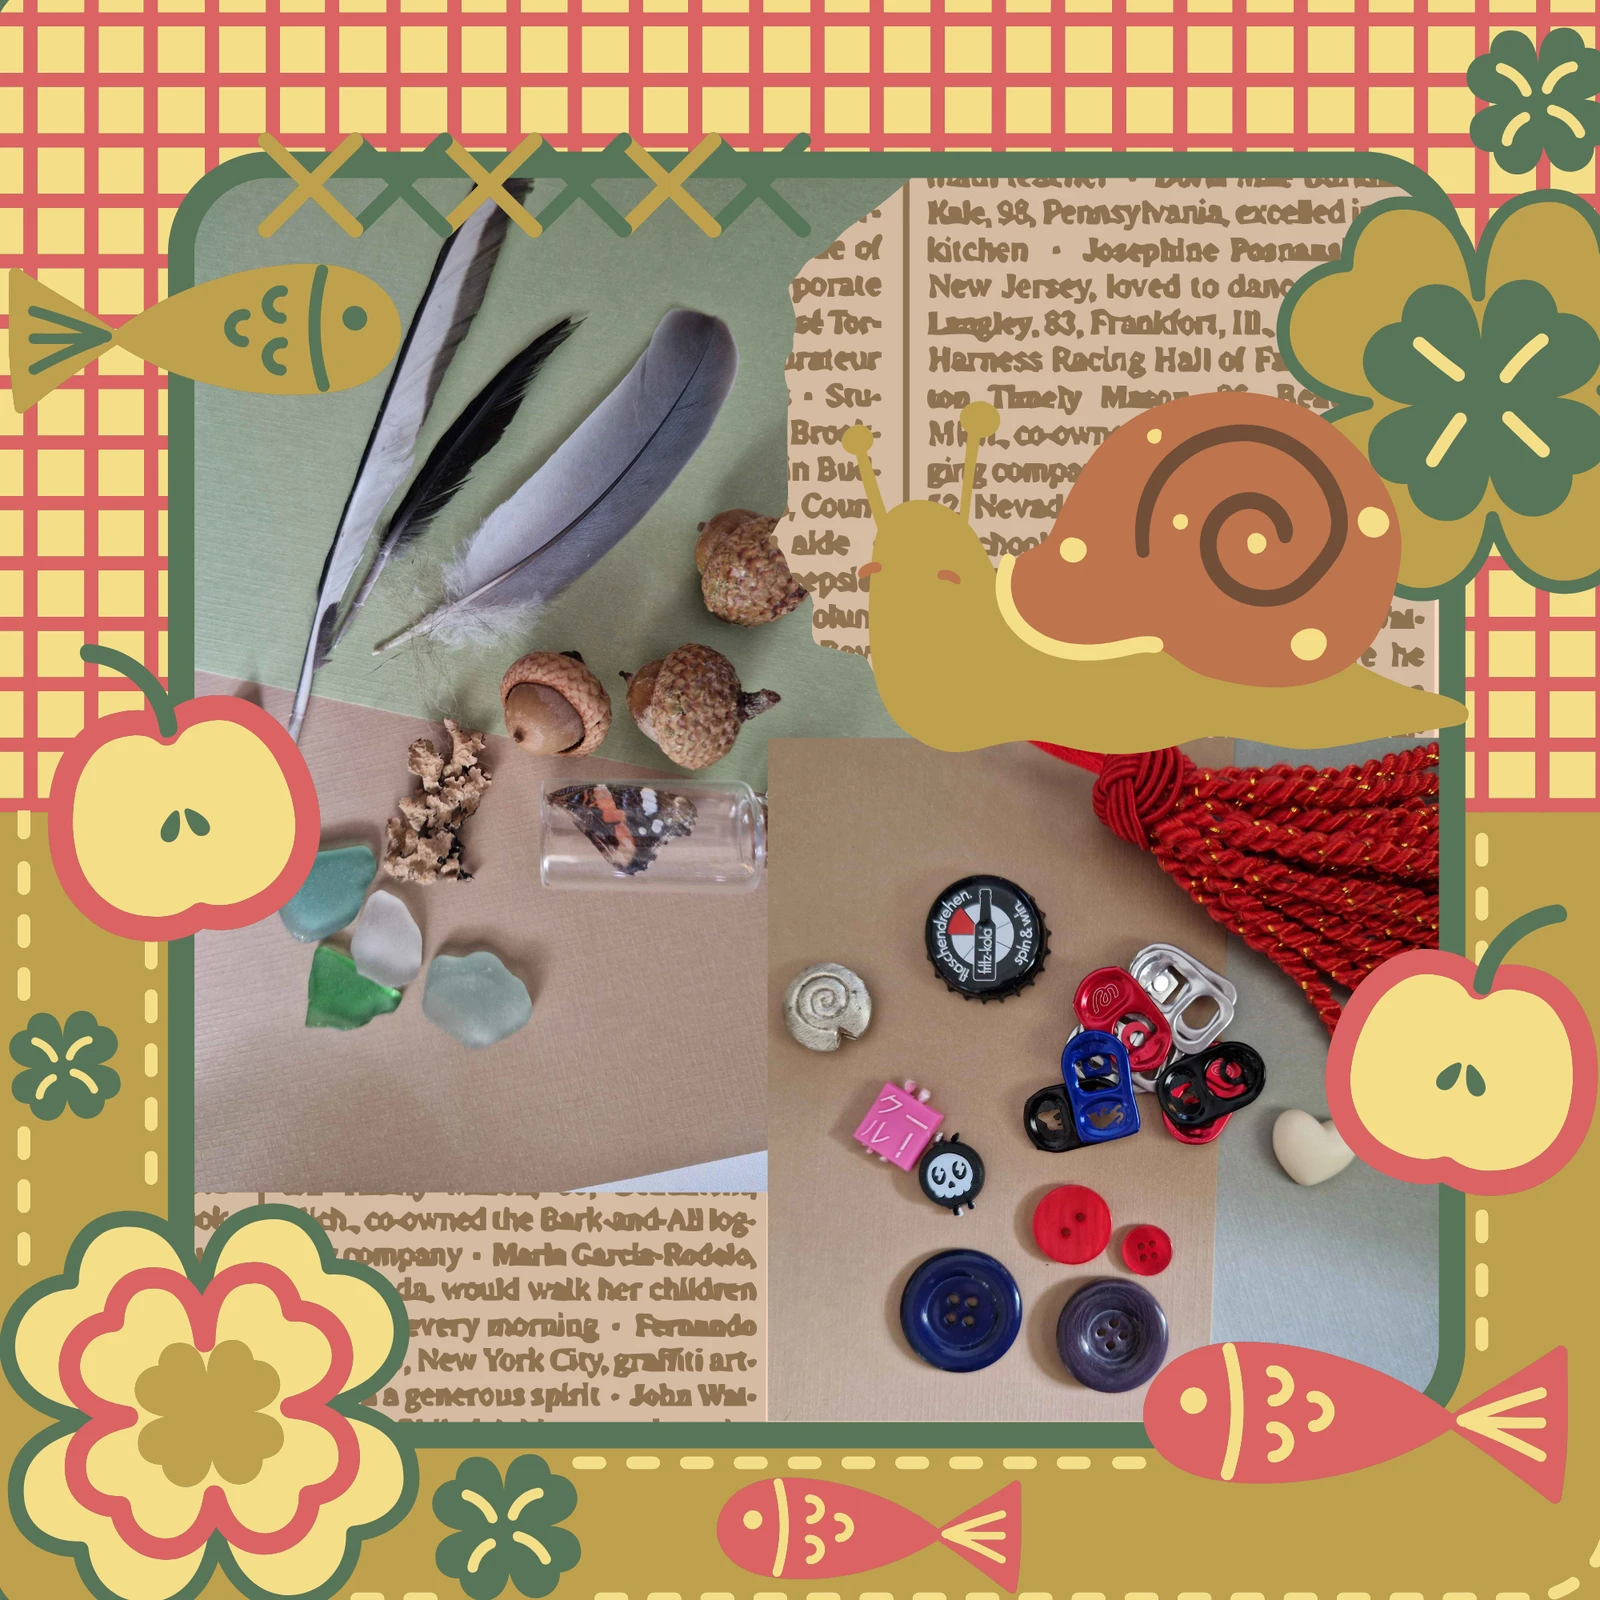
In many of my projects, I like to use random junk and trinkets I’ve collected over the years. The most joy I get out of crafting is finally finding the perfect use for a thing I’ve been saving for literal years, never knowing what to do with it.
Possible trinkets to use in crafts may be:
- Funky can tabs
- Metal bottle caps
- Charms from clothing tags
- Safety pins
- All sorts of colorful and fancy buttons
- Fragments of broken jewelry
- Studs and crystals that have fallen off clothing
- Defective hair clips
- The pulley part of a zipper (bonus points for fun colors)
Another great way to get creative when crafting and really personalize your DIYs while staying sustainable is to go out foraging — ideally in the woods or on a beach.
Here I love to pick up:
- All kinds of feathers
- Animal bones (be very careful to get them properly sterile and don’t touch them with your hands if possible)
- Abandoned snail houses
- Acorns
- Driftwood and pretty root pieces
- Seashells
- Sea glass (especially for mosaic-type DIYs)
- Crystals
- Funky-looking rocks
You might even find more fragile things out there that look beautiful but wouldn’t hold up as a trinket by themselves. I like to collect them in little glass bottles and make them into decor or trinkets by themselves.
If you find yourself in possession of a nice glass bottle, you might want to keep a look out for these:
- Wings of dead insects, such as butterflies, dragonflies or the likes
- Tiny, delicate skeletons
- Small eggshells from bird nests
- Snake skin
- Dried flowers and leaves
The EVA Foam Era
A few days later, my clay had already been used up, and I was scouring my craft supplies for a felt-like material to make cutout charms to glue to hair clips when I stumbled across my abundant EVA foam supply.
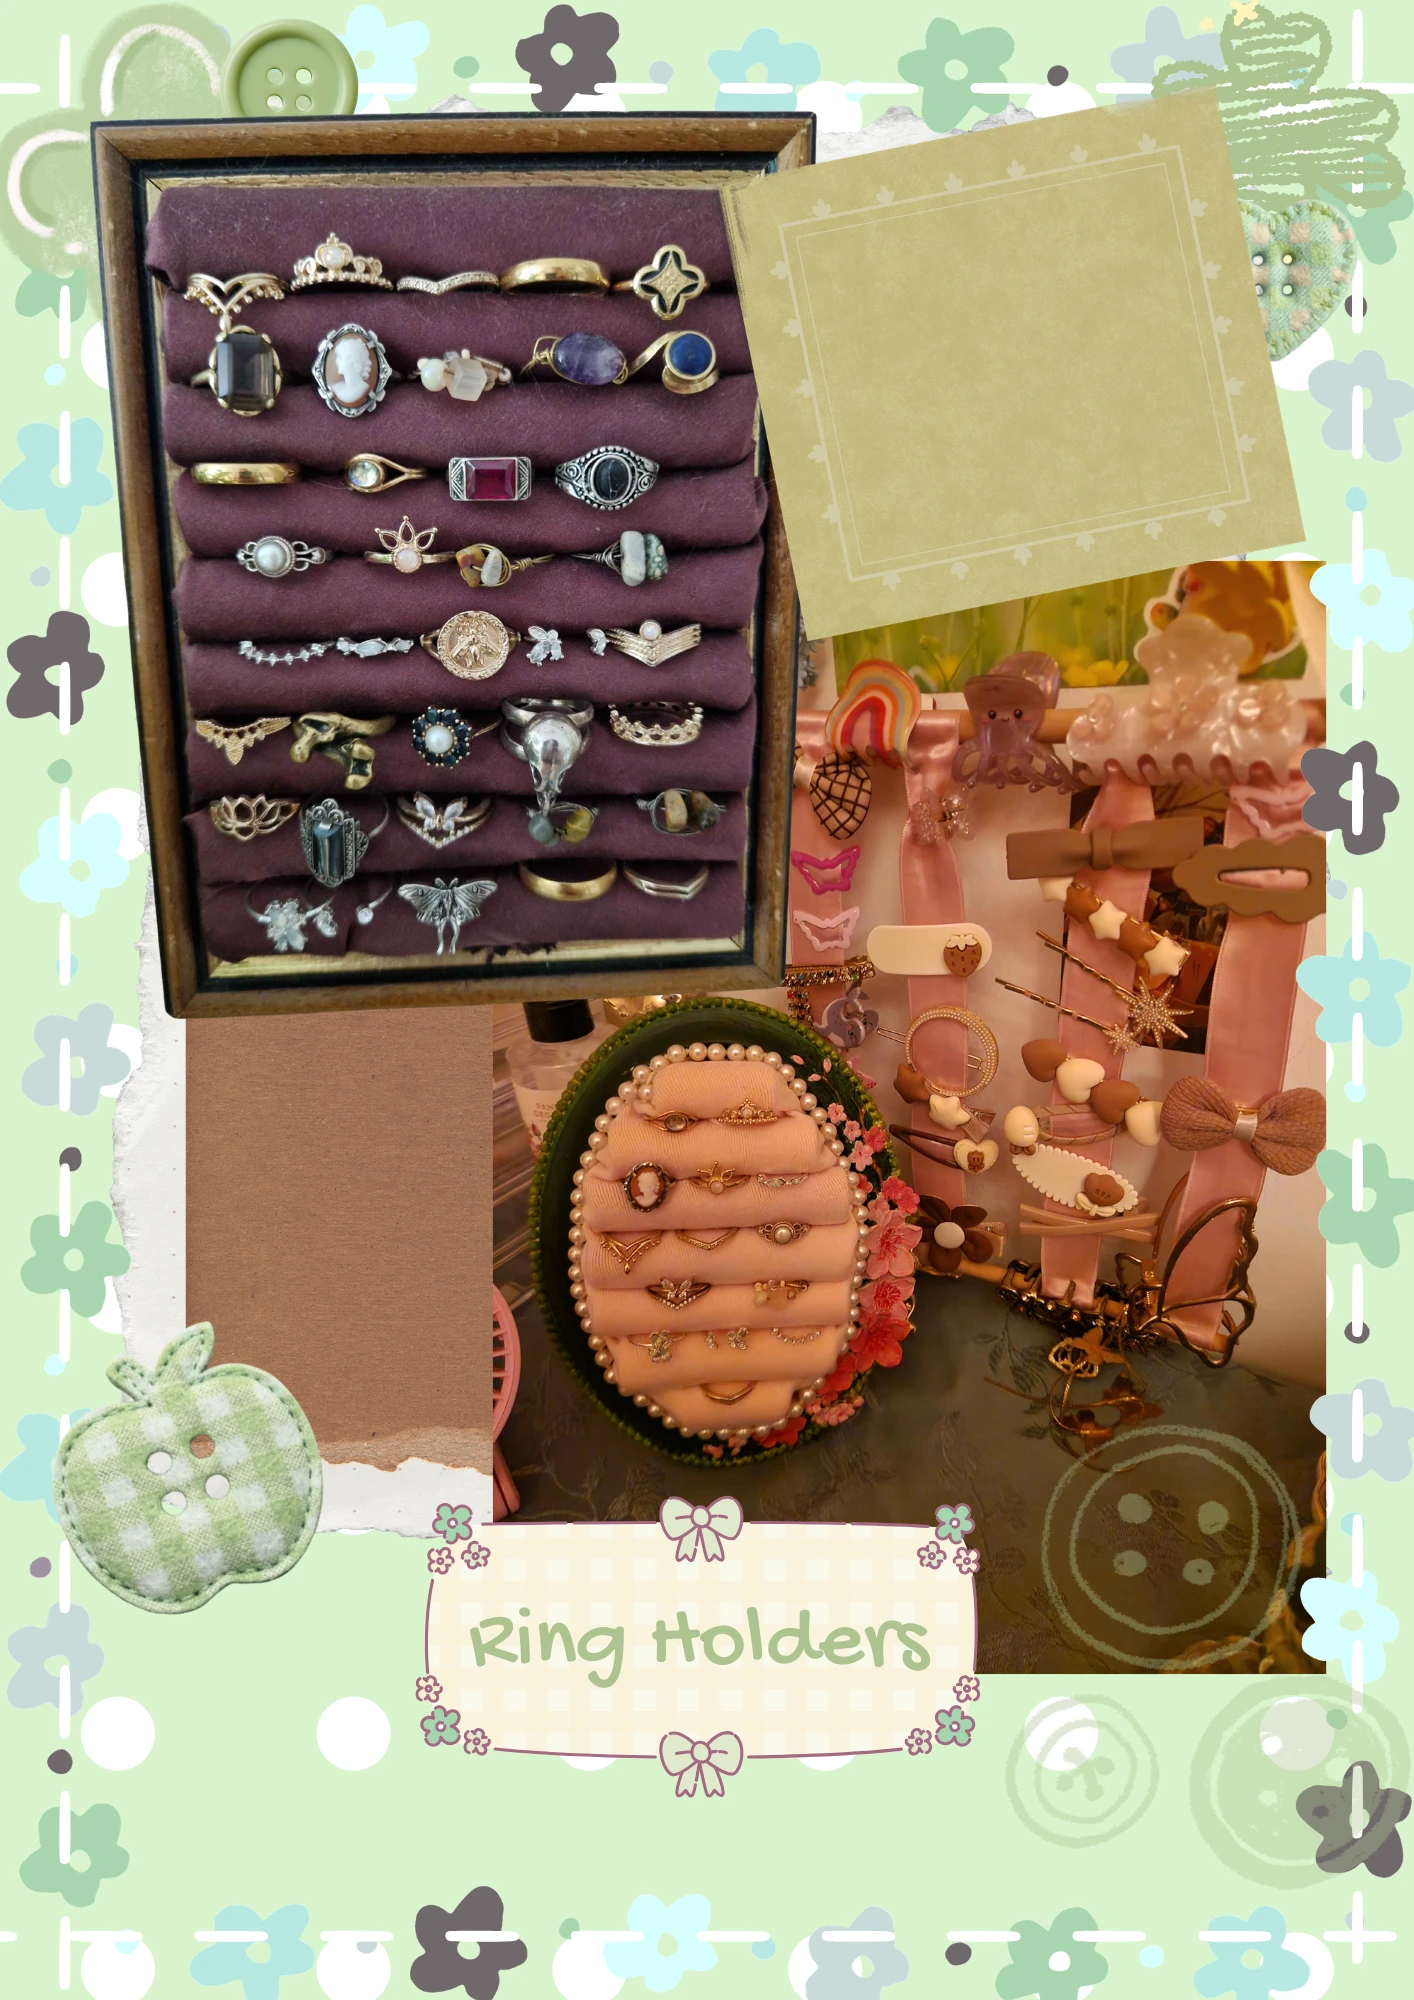
I had mostly used it in the past to make cosplays with, but also turned it into a lovely DIY ring holder, composed of a picture frame, rolls of EVA foam and some leftover satin scraps to cover it. It’s one of my favorite practical DIYs to this day, and I use it all the time.
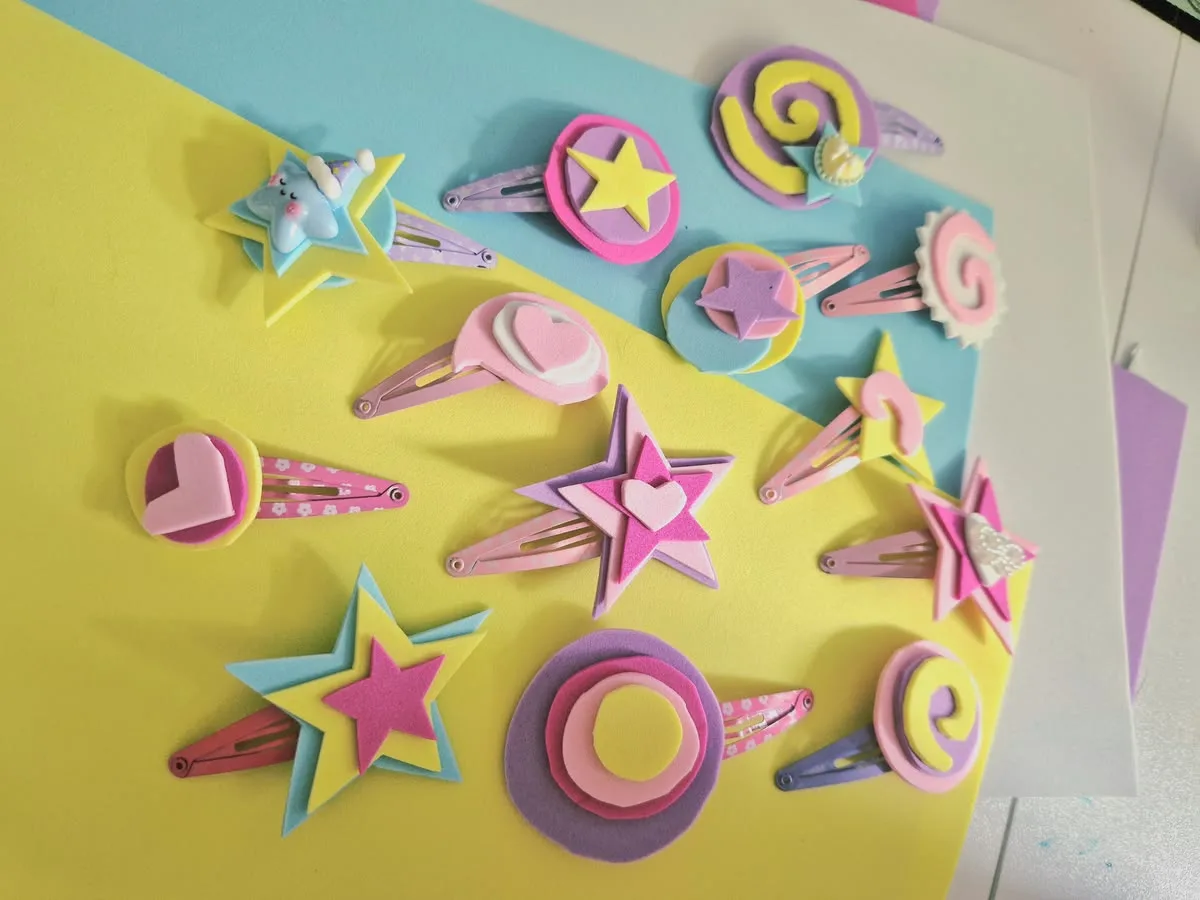
For my current project, however, I didn’t want to cover up anything about the foam and just used the cool color combinations it already comes in. I began sketching out some shapes and designs, cut them out and then arranged them on top of each other in the same order I had already planned to glue them together.
Lastly, I heated up my glue gun and got to work.
This was one of the easiest and most low-effort DIYs, and it made me really happy to only use materials I already had lying around. The bulky foam is a bit of clutter in my DIY space, so it was kinda good to use some of it up, too.
Turning Cardboard Trash Into a Scarf Display
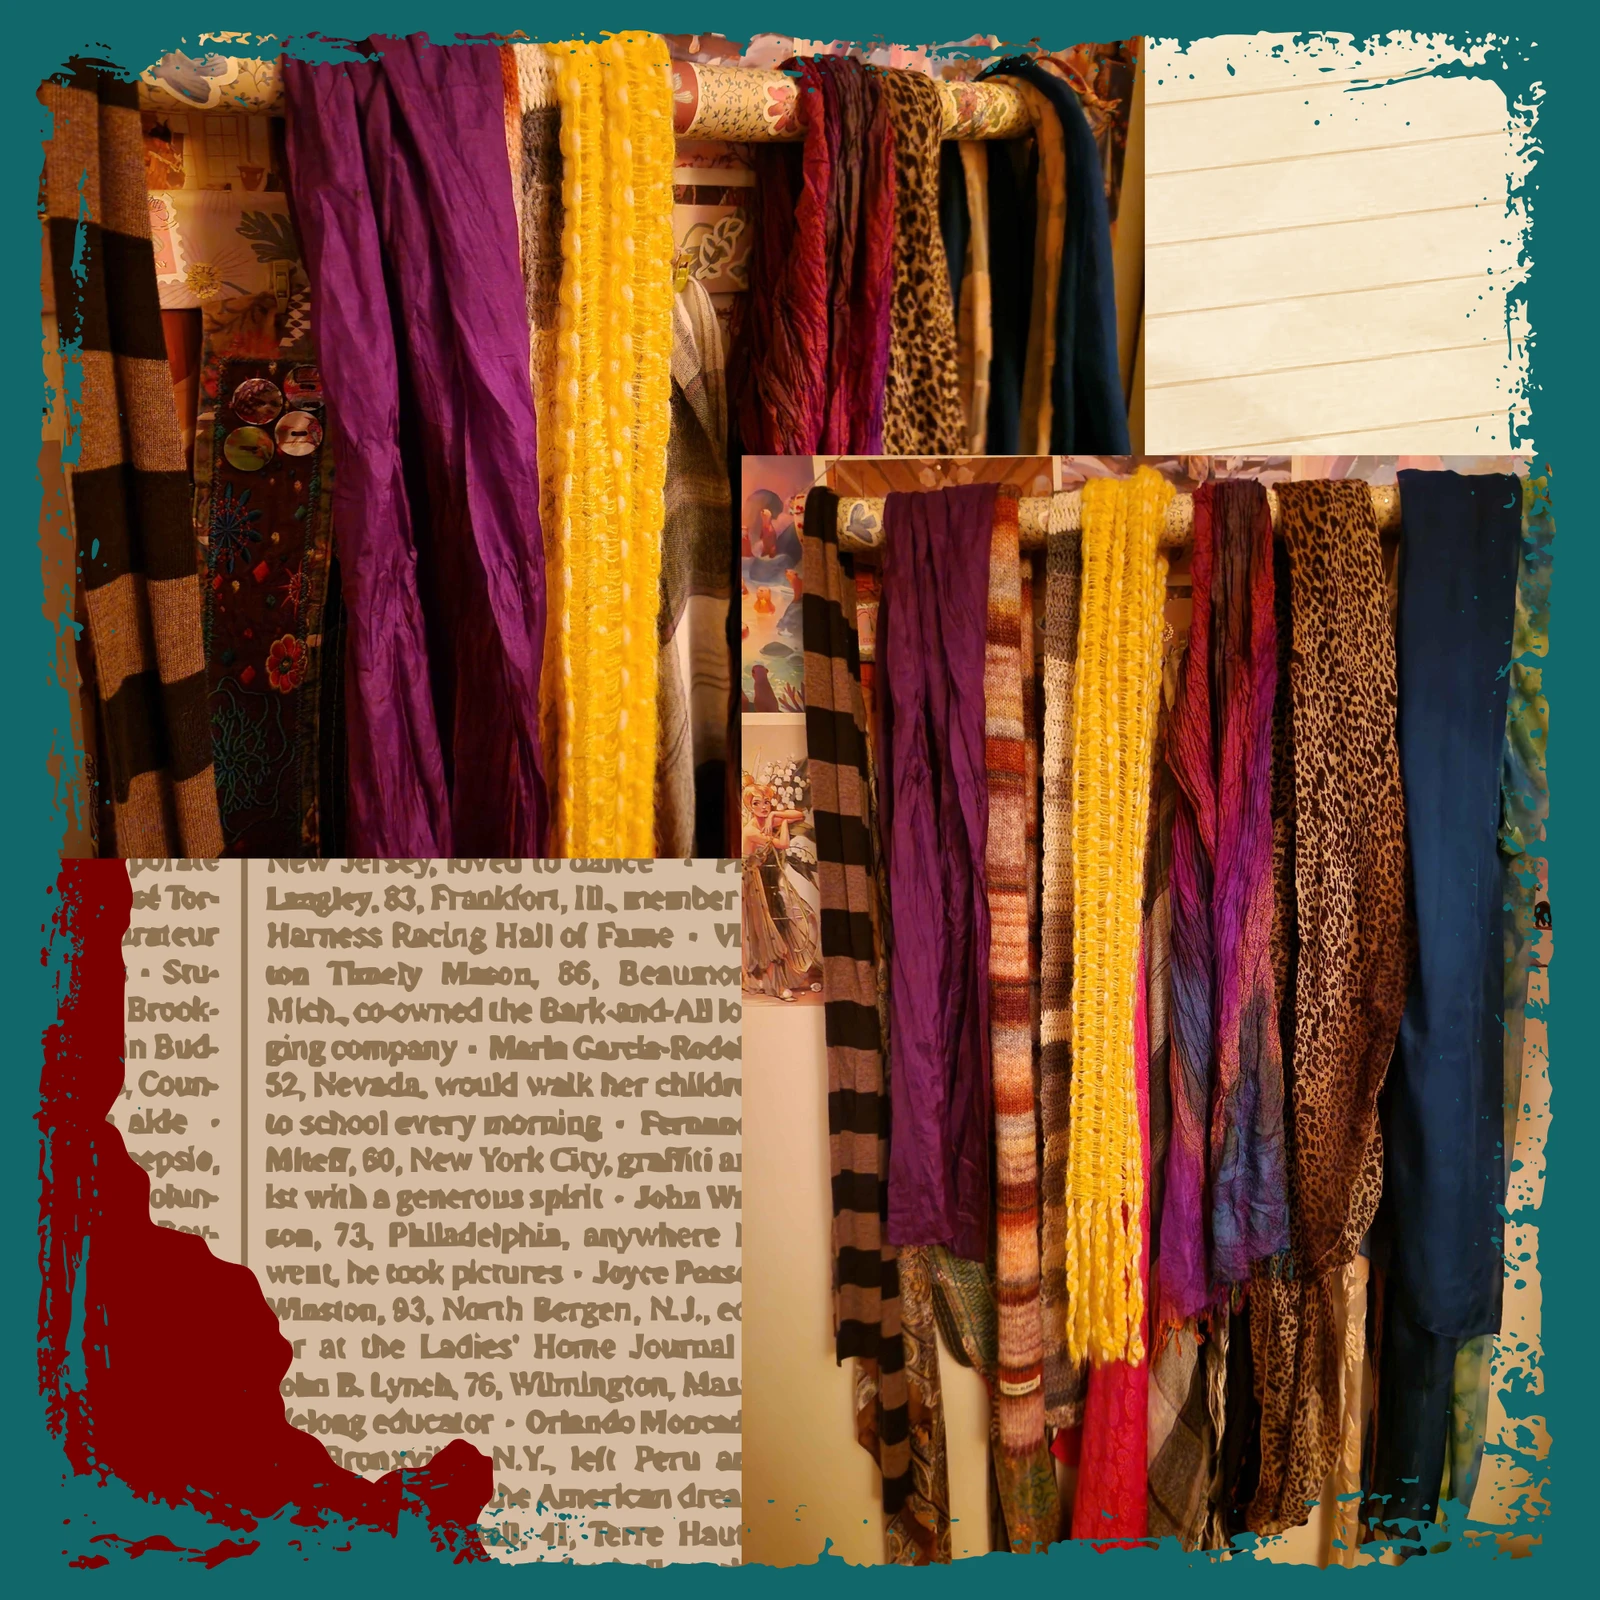
Over the course of my crafty DIY days, I’d been thinking of a way to store and display my many scarves and handkerchiefs in my room. Until then, they’d been a bit of an eyesore and were simply stuffed into my closet wherever they fit.
This, however, is very counterproductive when you’re trying to keep an overview of your collection so that you can plan outfits ahead and style them more efficiently.
For lack of ideas, I decided to look around and see if anything could give me inspiration for this project.
The answer lay in my partner’s room: a big pile of cardboard trash.
Jackpot!
Most useful to me were a long cardboard tube, likely a leftover from wrapping paper, and a long yet sturdy strip of thick cardboard.
First of all, I precisely cut the pieces so they were the same length. After that, I went straight to covering the arguably not very pretty surface with some decorative paper and also couldn’t help but put stickers all over, as one does with any DIY that allows for it.
Next up, I evenly spaced out little clips that I had leftover from a past project, glued them onto the board and gave them a quick coating in a pretty green color to make them fit with the overall theme.
To connect the pieces, I used ribbon and hot glue, assembling the tube piece in a way that allowed it to hang from the wall with some space in between, so it would be easier to hang my scarves.
To mount the entire construction, I then put some twine through the tube, tied it loosely so the piece could hang down from it and finally nailed the board piece to the wall with pretty gold-colored nails.
(Love nails, hate screws.)
The moment of truth: I hung my scarves. All of them.
And eureka!
It actually turned out perfect and allowed me to properly display all my scarves in a way that I could actually see and choose from them.
Absolute bullseye!
The Flannel Bow Project
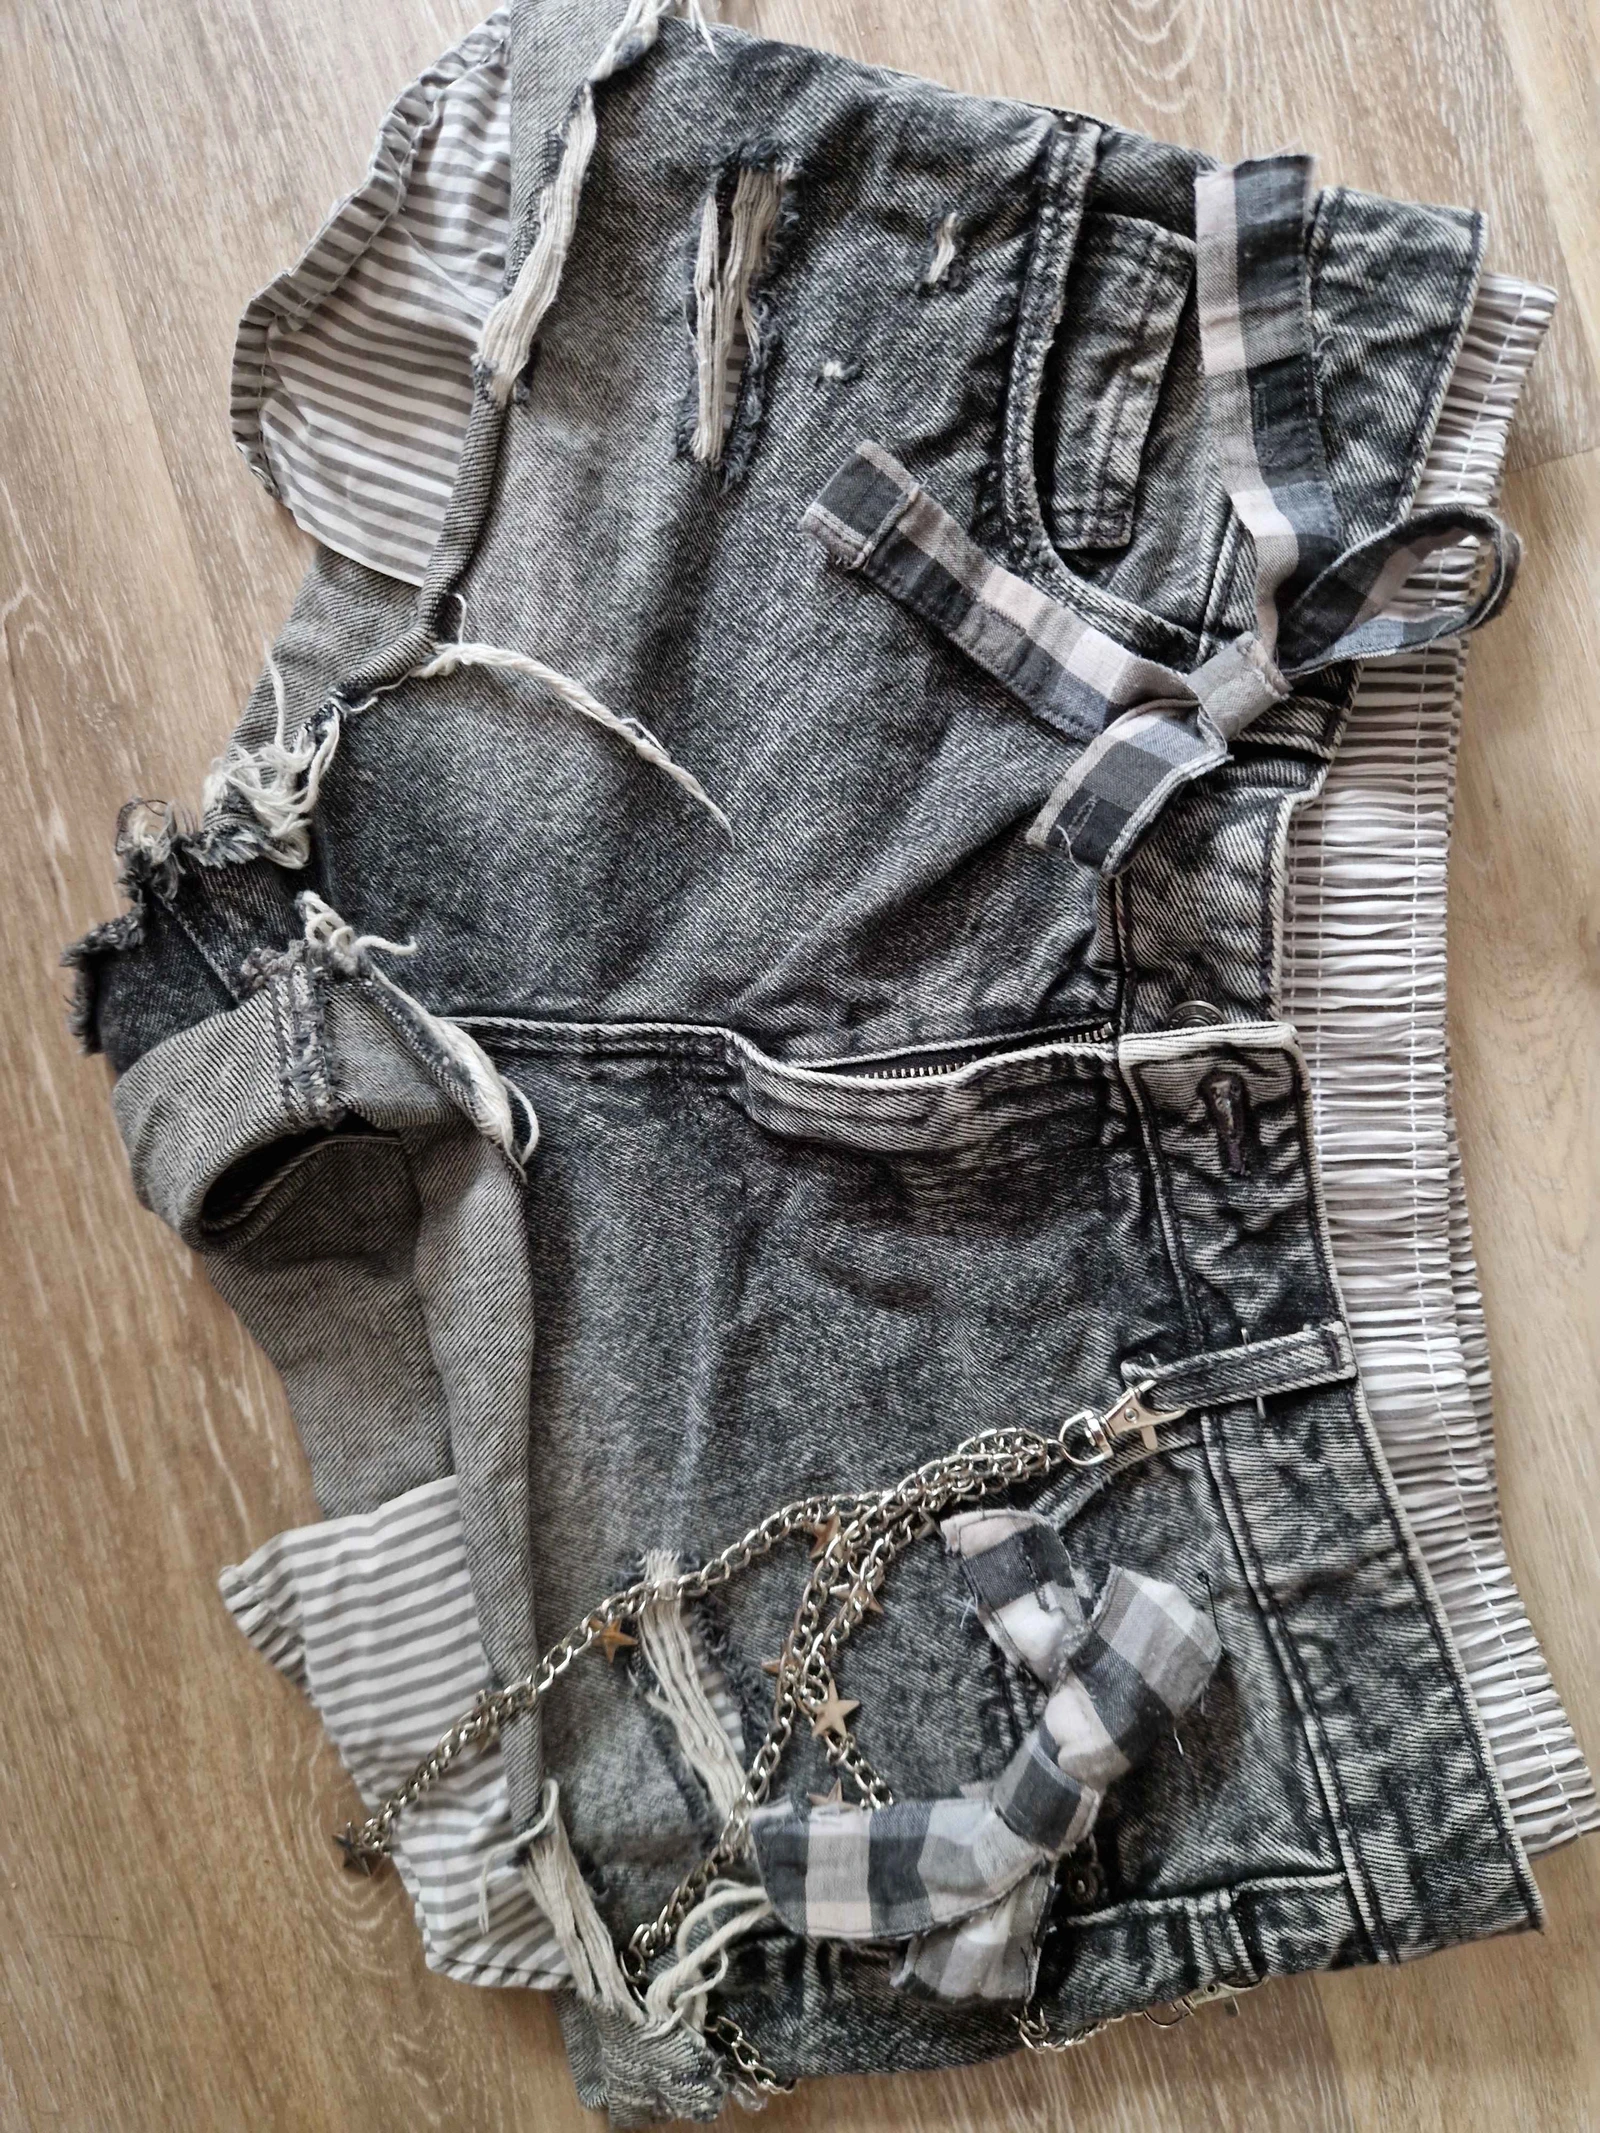
The last project came to me when I found a lovely, yet absolutely torn-up flannel in an up-for-grabs box on the roadside.
The grey and white checkered pattern was so perfect that I found myself thinking: Man, I wish I had some cute accessories with that material…
That’s when it dawned on me:
I can make that!!!
So off I went, just the decrepit blouse, my grandma’s hand-me-down sewing supplies and a dream in hand.
I had seen someone make adorable bows from fabric scraps a few days prior and was now following the tutorial, as well as figuring things out on the go. I gathered as many clean strips as possible, using pre-existing seams. Those I cut to length, assembled in a way that resembled a bow more than actually tying one and, once I was happy, secured them with a few stitches and a little strip in the middle.
I was able to create three bows and put them on old clips and pin backs from which the original application had fallen off at some point.
I still really love them, but I think they’ve mostly become a permanent upcycle to my hot pants at this point.
They just fit too perfectly.
Creating Without Consumption
In all this time crafting, what stood out to me most was that I could create all these fantastic DIYs with little to no new materials at all.
I was so lucky to be able to scavenge, use things I already had in my supplies or thrift for very little money most of these items. And while I created literal heaps of new DIYs, I think the overall cost was under 10 euros, which I find so cool and honestly amazing.
I hope to one day really live by the rule of create more than you consume, but often I feel like crafting and DIY have been tainted by consumerism so much. There’s a bit of a conundrum where you have to go buy things to make things, which I really don’t like.
This is why I’ve limited myself so much to these past crafts, where I used primarily self-made or foraged supplies together with what I already had at home. It was also a great opportunity to use up just a little bit of clutter and even trash that is filling up my apartment alarmingly fast.
So, if you take away anything from this blog post, let it be this:
We can actually create without consumption.
That trash can absolutely become treasure and doesn’t have to pollute our gorgeous planet.
If you’re wondering what to make next, go have a look at your supplies drawer first before you go out to buy something. I have found that the easiest supplies — foam sheets, air-dry clay, pipe cleaners, fabric scraps and paper scraps — can be found, at least in parts, in many homes, alone and forgotten in some drawer, waiting.
Go give new life to those goodies. Don’t go on a binge-buying spree and get a ton of pre-produced supplies, kits and whatnot. You can make things that are just as nice right now, at home.
DIY as a Little Act of Rebellion
In its roots, DIY is not just fun and cute. It is a political form of protest. A show of creativity and ingenuity.
It stands against consumption and offers a sense of freedom from our capitalist hellscape.
So many gorgeous aesthetics and movements have come from just some people who liked making and wearing things. DIY is such a core part of so many subcultures that has been forgotten by most people who just consume the aesthetic and be done with it.
But crafting really is a unique way to merge your passions with a way to display or wear them.
So go and make something.
Make it your own, too.
That’s the thing that’s actually gonna make you love what you make.